


Here’s the outline of how you customize the sign-in/sign-up page for an Azure AD B2C tenant. The same approach will probably work for the other customizable pages, but I haven’t tried that out yet.
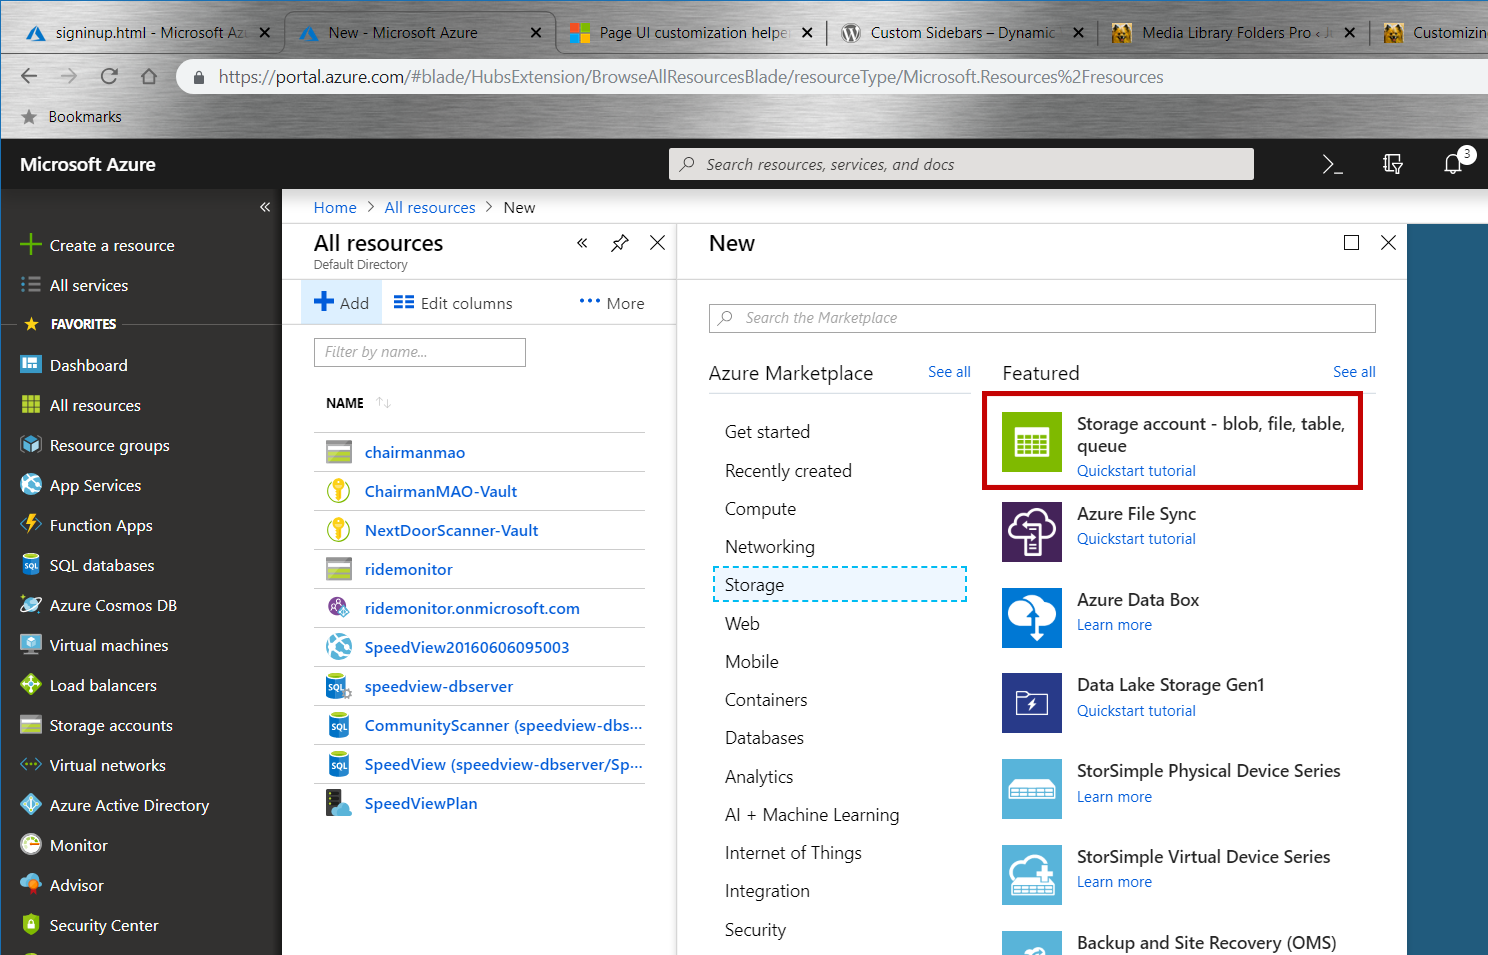
Create a Storage Account
It doesn’t necessarily have to be a blob-only account (i.e., it can be configured to store files and other stuff as well), but a blob-only account will do (I set mine to also include files and tables).

Create a Blob Service
You could probably also create a file service, but I figured I’d at least partially follow the online instructions from Microsoft, and use a blob service.
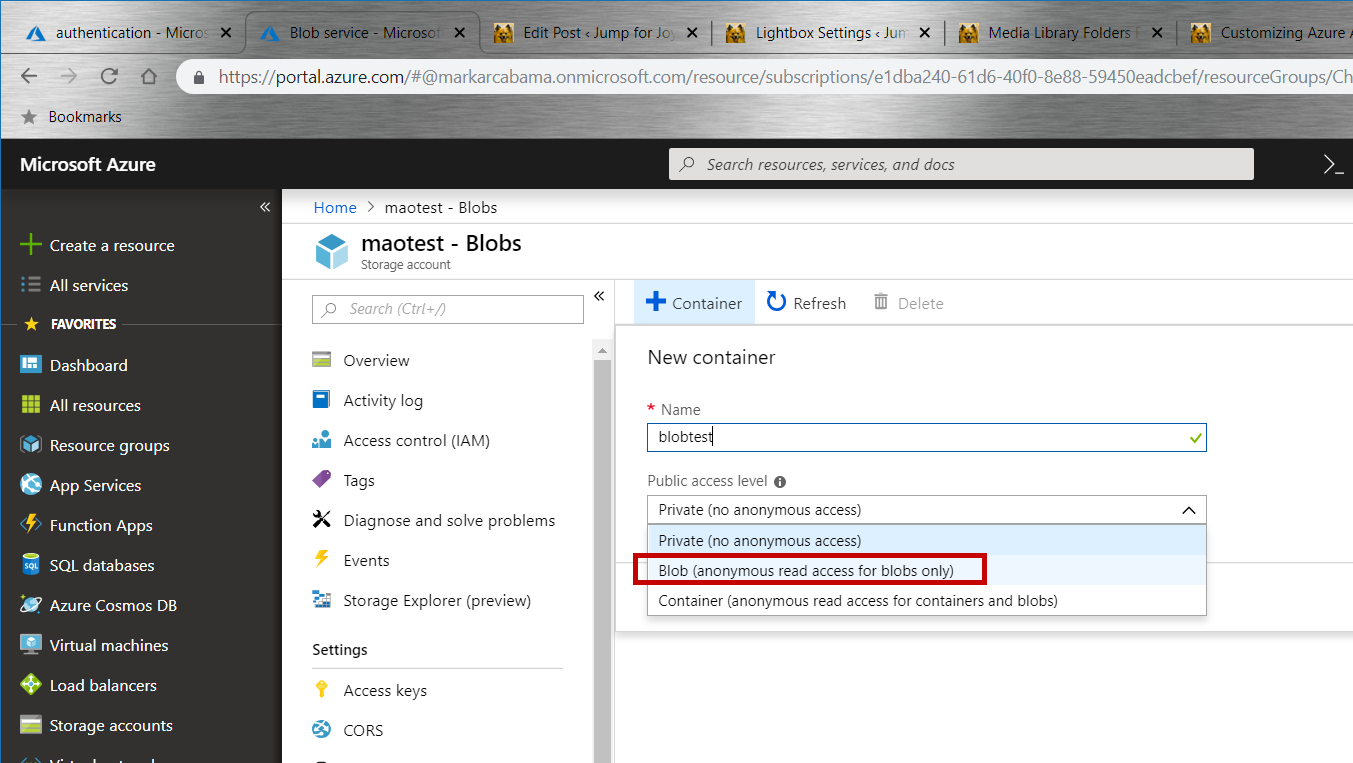
Once you create the service, you need to add a container… and make sure it’s accessible anonymously, or you’ll trigger an error when the Azure AD B2C system tries to load files from the container.
Upload the Blobs
You’ll need to upload the files you want the Azure AD B2C system to use to the blob container you just created. In my case, I uploaded:
- the html file defining the sign-in/sign-up page I wanted to display (see below);
- the css file used by that page; and,
- the background image file for the page
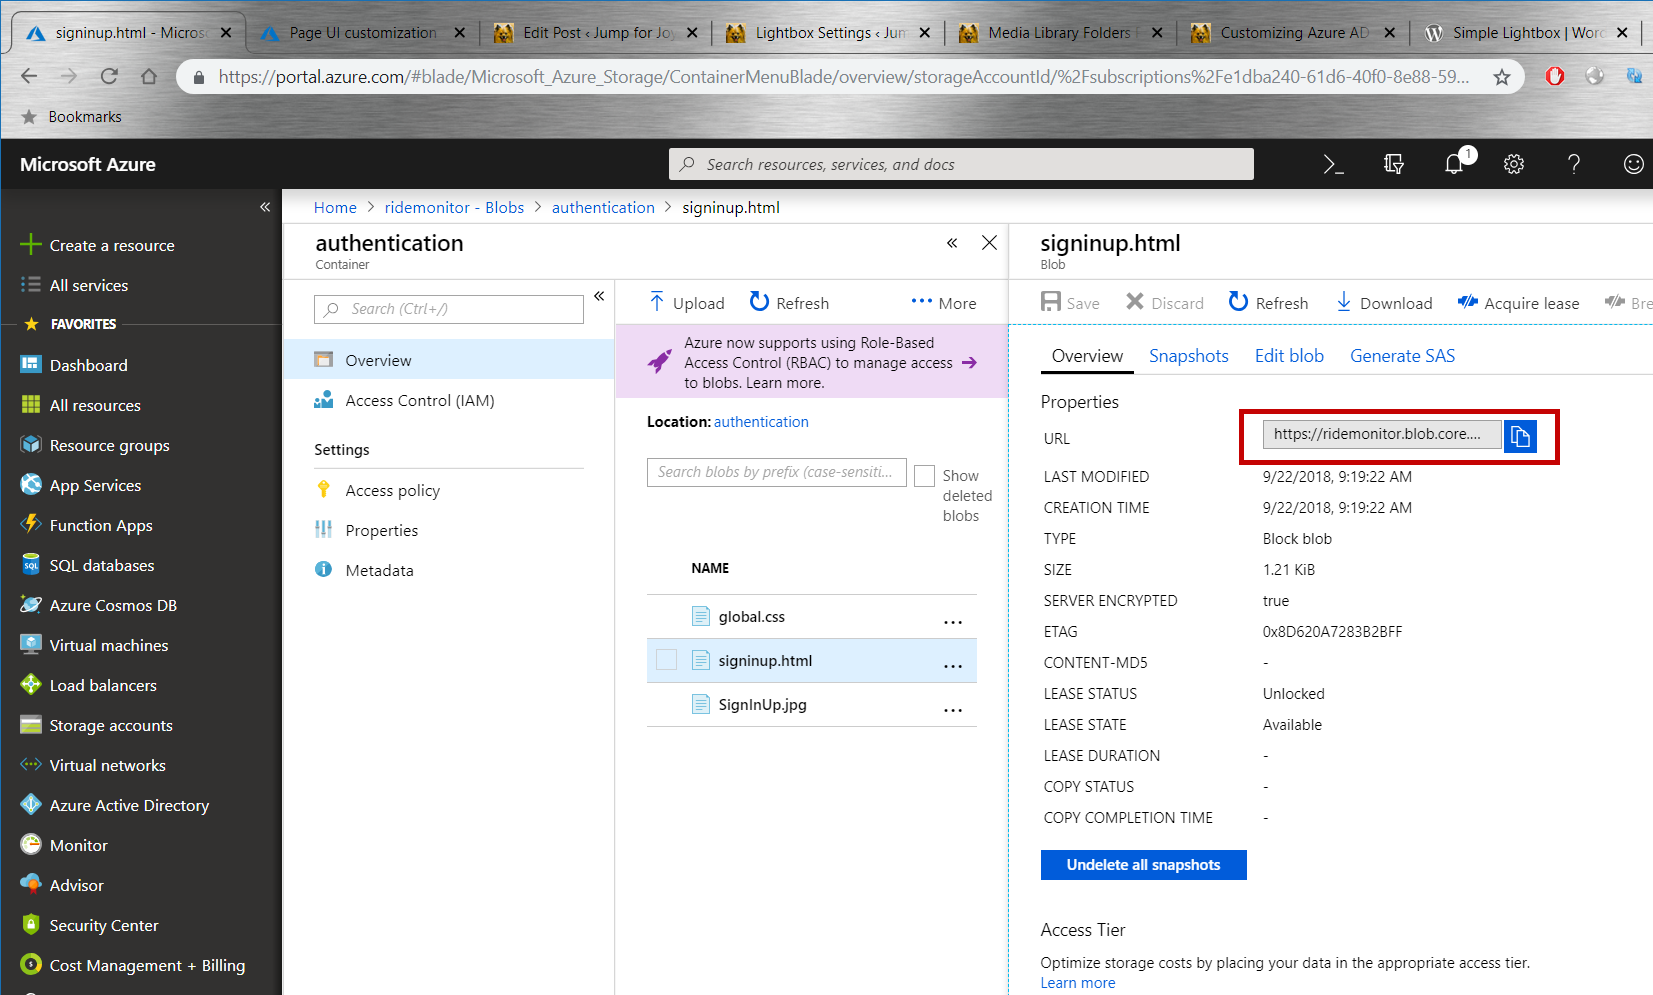
For each of the files you upload, you’ll need its URL so you can configure the Azure AD B2C system to find and use the files. An easy way to do this is to click on the blob entry after you’ve uploaded it, and then click on the copy URL icon.
Configure AD B2C to Use the Blobs
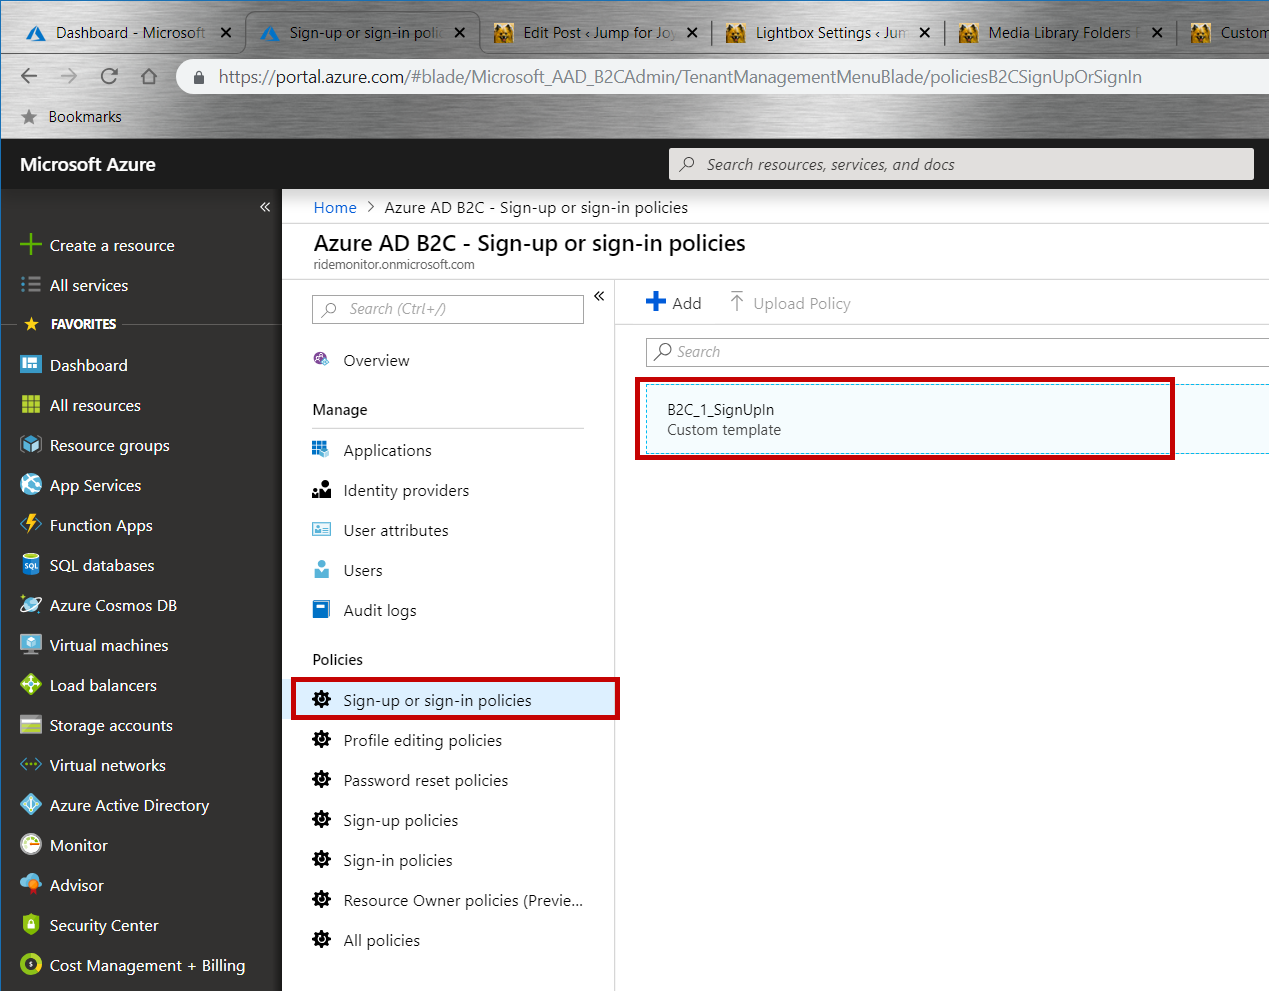
Get over to your previously set up AD B2C blade, select Sign-up or sign-in policies under Policies, and then create one (I already did this, so I’m just going to click on the policy I previously set up).
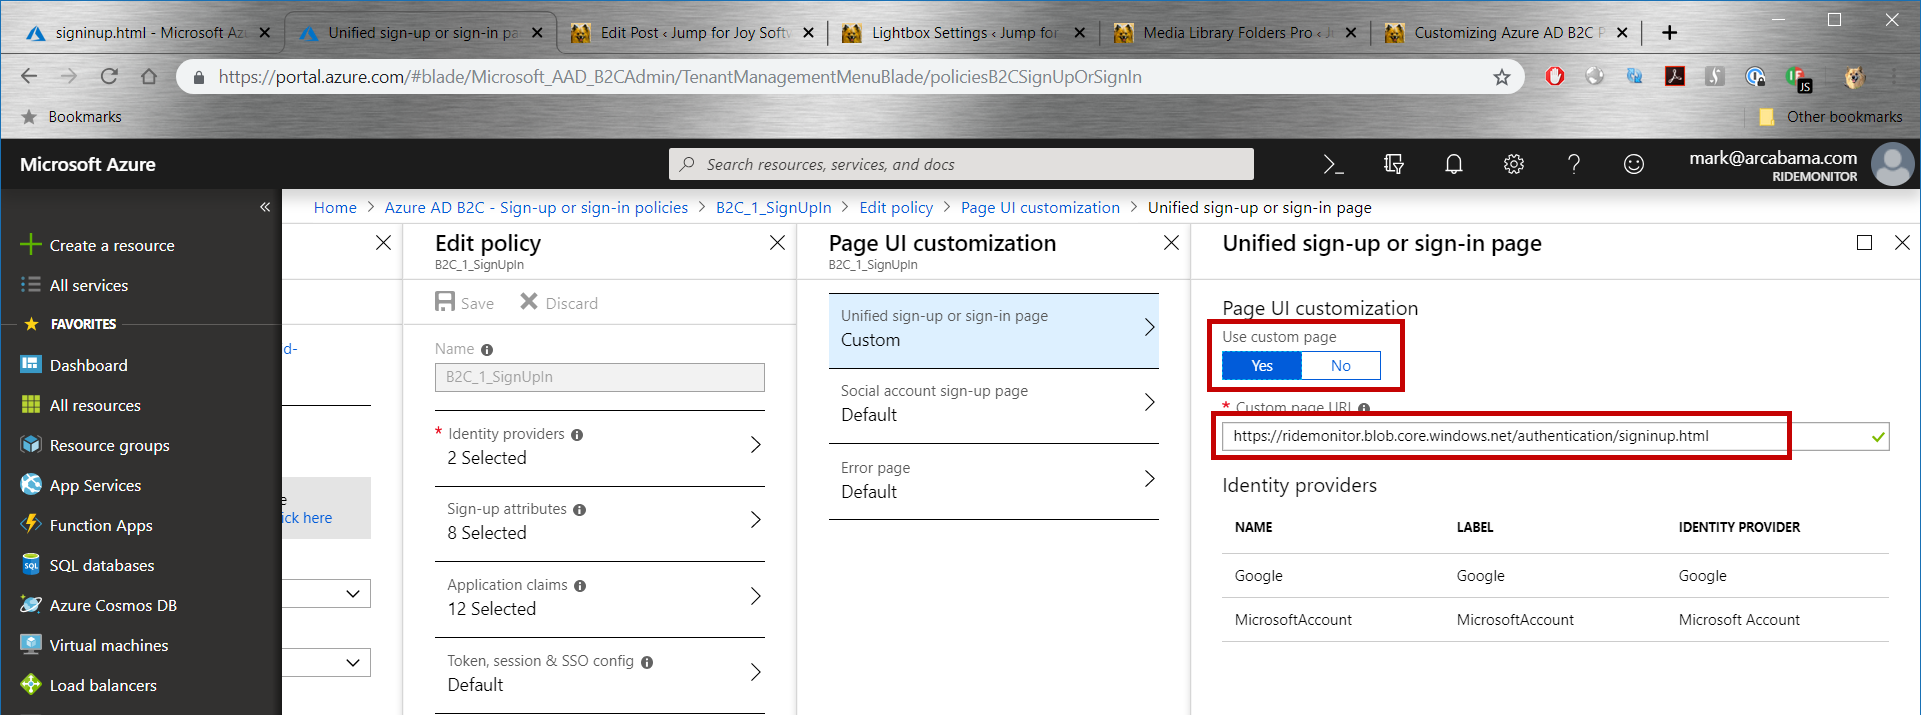
Click on the Edit link, the Page UI customization link, and the Unified sign-up or sign-in page link. The text you’ll see displayed under each of them will be different, because I’ve already customized stuff, whereas initially your configuration will be using the AD B2C defaults.
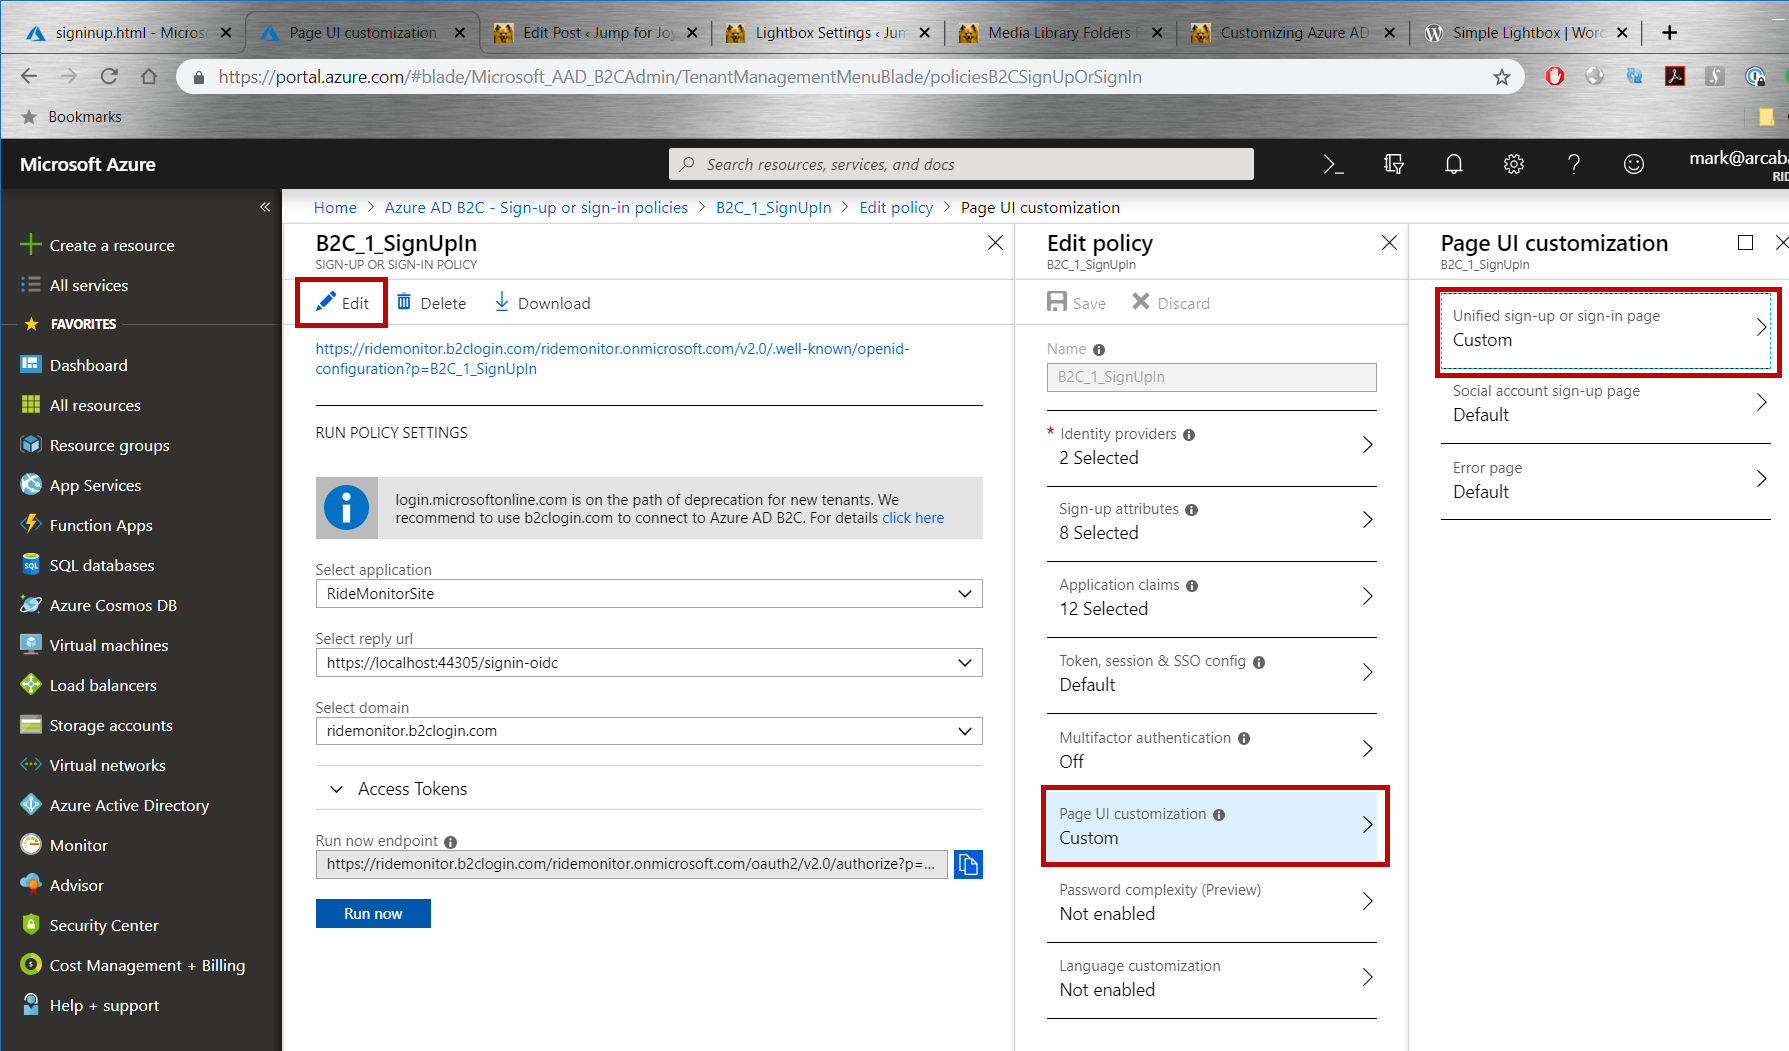
This will bring up, finally, the blade you need. Select Use custom page, and then paste the URL of that html page into the text box. Click all the OK boxes and Save boxes that you need to store all the changes, and you’re done with the basics.
Editing the Html File
It’ll take you some time to configure the html file that defines what gets displayed by the AD B2C system. You’re only allowed to use a limited subset of html coding practices and services in it. I’m not clear on exactly what those limitations are — remember, I’m writing this because the Microsoft documentation, at least as of right now, leaves a lot to be desired — but my understanding is that you can’t use any kind of javascript. So you’re dealing with a pretty static type of page, although you can use bootstrap for styling (but probably not any of the stuff that depends on javascript).
You also can’t do stuff that involves modifying the body tag. That’s because, behind the scenes, what the AD B2C system is doing is parsing your html file, grabbing the stuff between the body tags, and filling-in a particular div it’s expecting — one with an id equal to “api”, without the quotes — and ignoring everything else. Which means it’s ignoring stuff associated with the body element.
That causes some problems when you’re trying to use, say, a background image. But, as with most things CSS, where there’s a will (and access to Google), there’s a way. Here’s the simple html file I ended up with to display my sign-up/sign-in AD B2C form:
<!DOCTYPE html>
<html>
    <head>
        <title>Sign in</title>
        <meta charset="utf-8" />
        <meta http-equiv="X-UA-Compatible" content="IE=edge">
        <meta name="viewport" content="width=device-width, initial-scale=1">     <!-- TODO: favicon -->
        <link href="https://maxcdn.bootstrapcdn.com/bootstrap/3.3.5/css/bootstrap.min.css" rel="stylesheet" type="text/css" />
        <link href="https://ridemonitor.blob.core.windows.net/authentication/auth.css" rel="stylesheet" type="text/css" />
    </head>
    <body>
        <div class="panel-body">
        <div class="panel-signon">
            <h1>Ride Monitor</h1>
            <div id="api" data-name="Unified" class="panel-api">
            </div>
        </div>
        </div>
    </body>
</html>
Not much to it. In fact, I didn’t end up using bootstrap’s layout system, although I included a bootstrap css file to take advantage of some basic look-and-feel stuff that’s apparently used by AD B2C.
The associated site css file is equally simple:
.panel-body {
    position: fixed;
    width: 100%;
    height: 100%;
    left: 0;
    top: 0;
    background-image: url("https://ridemonitor.blob.core.windows.net/authentication/SignInUp.jpg");
    background-size: 100%;
    background-repeat: no-repeat;
    z-index: 10;
}

.panel-signon {
}

.panel-signon h1 {
    text-align: center;
    color: darkred;
}

.panel-api {
}

#api ul {
    list-style-type: none;
    padding-left: 0;
}

#api[data-name='IdpSelections'] ul {
    text-align: center;
}

#api[data-name='Phonefactor'] .buttons button#cancel {
    width: 32%;
}

#api[data-name='SelfAsserted'] > div:first-child {
    display: none;
}

#GoogleExchange {
    background-color: #C64A29;
    background-image: url("https://ridemonitor.blob.core.windows.net/authentication/googleplus.png");
    background-repeat: no-repeat;
    background-size: 50px;
    margin: 10px 0;
    padding-left: 55px;
}

#GoogleExchange:hover {
    background-color: #C14325;
}

#MicrosoftAccountExchange {
    background-color: #28B1E6;
    background-image: url("https://ridemonitor.blob.core.windows.net/authentication/microsoft.png");
    background-repeat: no-repeat;
    background-size: 50px;
    padding-left: 55px;
}

#MicrosoftAccountExchange:hover {
    background-color: #189DCF;
}

.accountButton {
    border: none;
    border-radius: 2px;
    color: whitesmoke;
    font-size: larger;
    height: 45px;
    width: 284px;
}

.accountButton:hover {
    border: none
}
The classes beginning with panel- were created by me. Everything else I copied and pasted from a Microsoft sample I found online. That turned out to be important, because, since a lot of stuff gets dragged in for that div marked with id=”api”, and if you don’t know what Microsoft is labeling the various elements, you can’t style them. In that regard, F12 in Google Chrome is also really helpful here, because it lets you see exactly what AD B2C is inserting into the page definition. I also uploaded to my blob container two images, one for the Google identity service, and one for the Microsoft identity service.
I also suppose that the element ids and class references are yet another Azure failure point, since no doubt they’ll all be changed by some zealous designer, who will then forget to ask to have the documentation updated…
In any event, here’s what the final (for now) result ends up looking like:
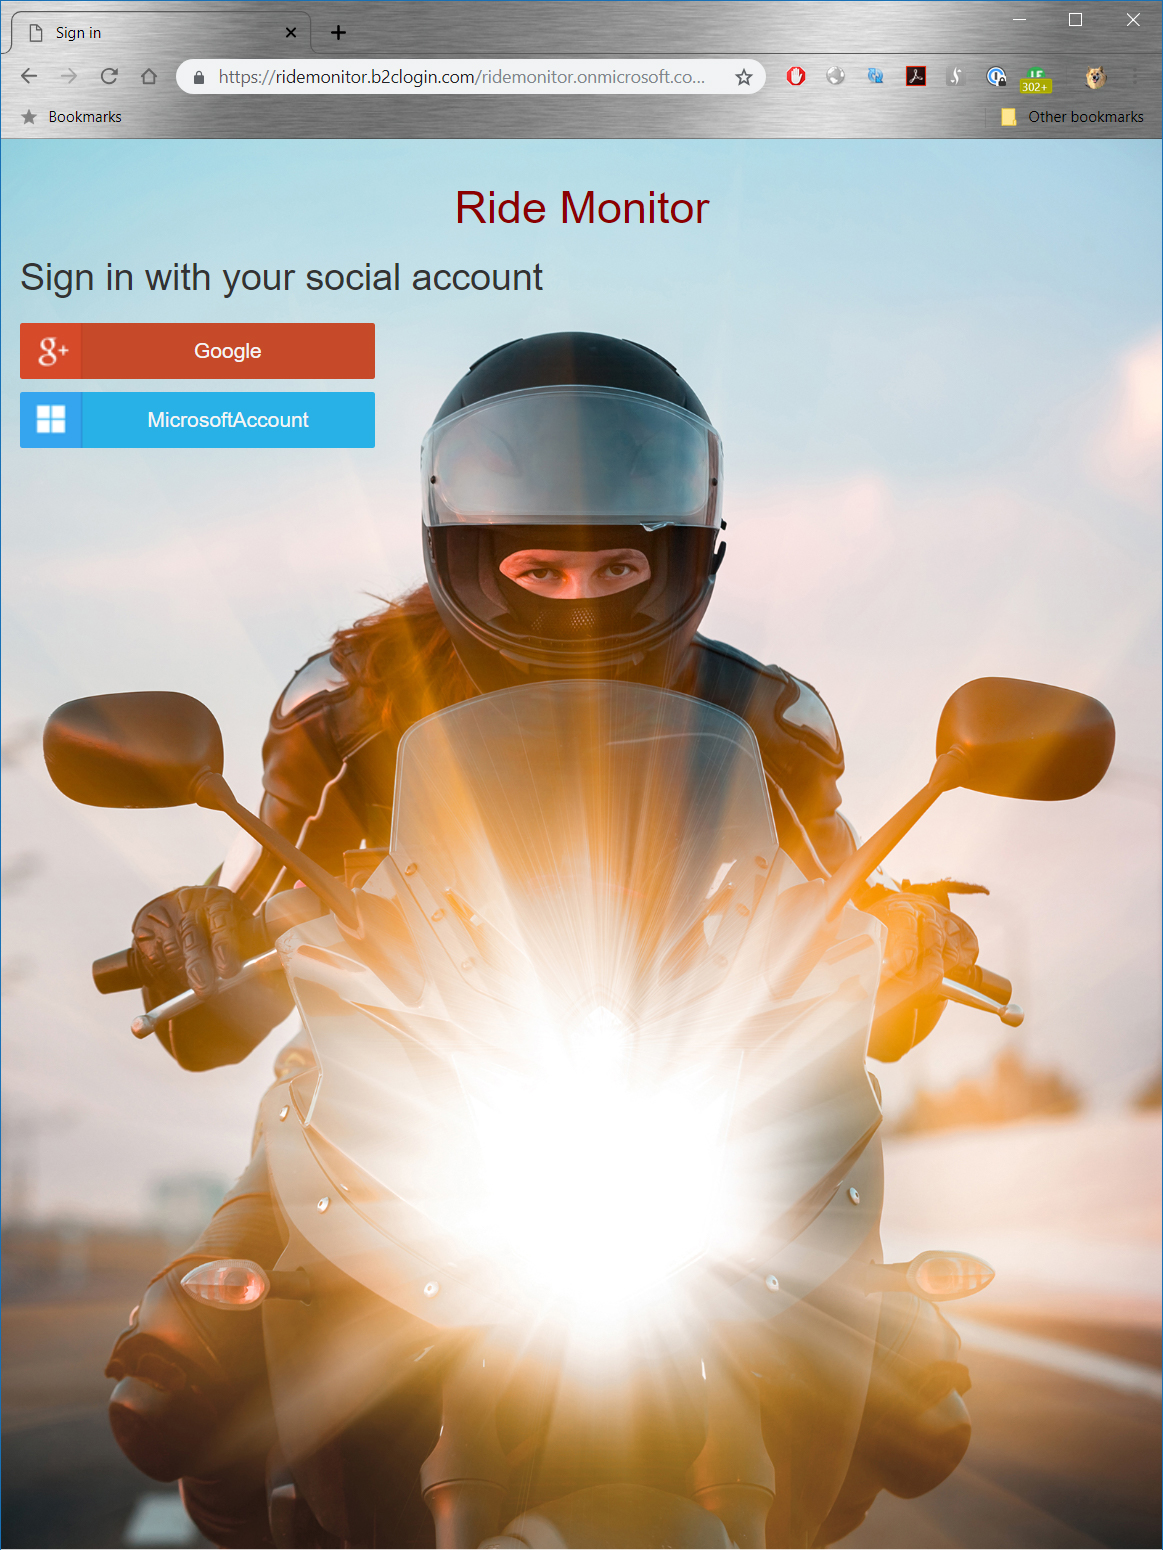
Pretty neat, don’t you think?
Check out this subsequent post, which broadens what I’ve done here to provide a consistent look and file across all the AD B2C pages.